Follow these steps to integrate with Lutron (RR Select, RR2, RR3, QS, QSX, Athena, Quantum, My Room Prime):
Step 3. Assign Actions to Lutron Buttons.
 |
 |
 |
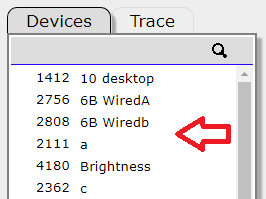
Make sure Lutron devices appear under Devices before proceeding: Within the e-Node/Lutron/Table tab, fill in the column entries (for each row of assignments) as shown below:
-
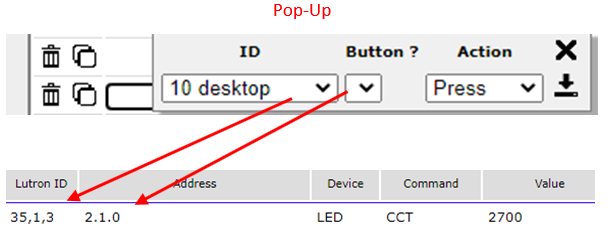
• LUTRON ID. Scroll down and pick the desired Lutron control Device (from the pull-down).
-
• BUTTON ? Select box and scroll down to select applicable button (use the ? hyper-link to identify Lutron button numbers).
- • ACTION. Select any 1 of 4 possible button actions (already programmed within Lutron software) for this trigger.
-
• ADDRESS. This is the Zone/Group/Node address expressed as three octets separated by periods (see Understanding Addressing) An example might be 2.1.1
- • DEVICE. Select the target device type (LED, Motor, or Key) from the scroll list.
- • COMMAND. Select the target CSI command from the scroll list.
- • VALUE. Where required, enter a # (i.e., brightness {SET} level from 0 to 240, CCT level from 1700 to 7000(k), EFFECTs from 1 to 4, RECALL/STORES from 1-24, Circadian (SUN) levels from 0{dark) to 240(midday), and Hue/Sat/Red/Green/Blue/White levels from 0~240. For a complete list of commands see the latest SDK here.
Continue through each row until completed (only program rows that you need).
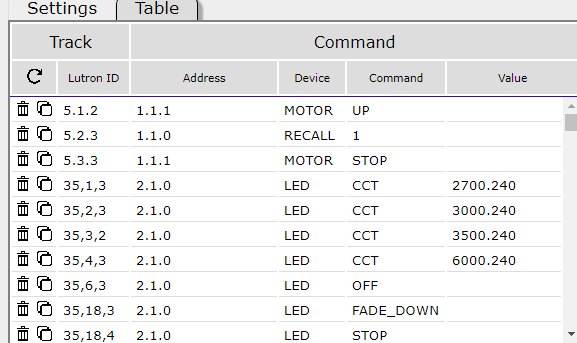
Here is an example of a completed table with a variety of commands for 10-button desktop for non-LEAP processors.
| Non-Leap Lutron Table |
 |
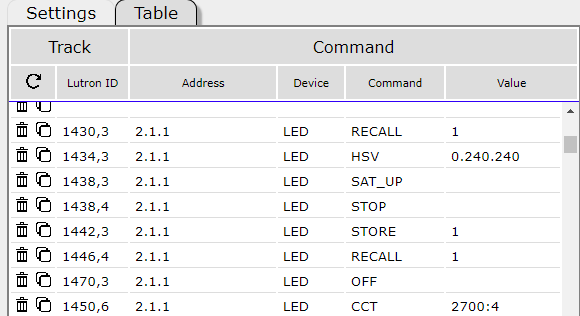
Here is an example of a completed table with a variety of commands for 10-button desktop for LEAP processors.
| Leap Lutron Table sample commands A | Leap Lutron Table sample commands B |
 |
 |
Note: Most of the entries from both non-LEAP and LEAP processors above are self-explanatory. A few comments though:
- -The Device IDs for LEAP devices have two entries, while non-LEAP device have three entires separated by commas (i.e., 1430,3 for LEAP and 5,1,3 for non-LEAP).
-
-The HSV commands refers to Hue/Saturation/Brightness. All are expressed as digits from 0 to 240 for each parameter and separated by periods (i.e., 0.240.240 is Red (0), Full Saturation (240) and Full Brightness (240) while 80.240.140 is Green (80), Full Saturation (240) but half brightness (120)).
- -You will see STOP commands which are designed to send a STOP when a certain button is released. However, until that button is released the previous command issued (such as FADE_UP above) will continue to operate until followed with a STOP command.
- -The CCT command "2700:4" means that a dissolve rate of "4" seconds will be used rather than the default set for that dissolve rate within the Web Pilot app for the particular operation.
- -Although we prefer Hue/Saturation/Brightness commands "HSV" you also can control with RGB or RGBW (again range for each emitter is 0~240).
- -We provide up to 24 custom Store locations which can be saved using STORE command and recalled using the RECALL command.
 |
 |